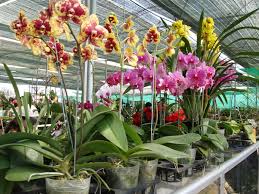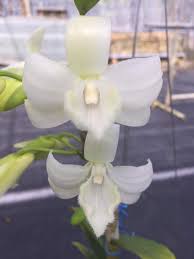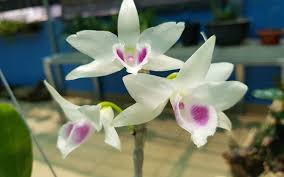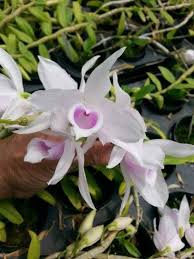
Phalaenopsis orchids, commonly known as moth orchids, are renowned for their stunning, long-lasting flowers and are popular among both novice and experienced gardeners. One of the most exciting times for any orchid enthusiast is when their Phalaenopsis orchids are about to bloom. Recognizing the signs that your orchid is preparing to flower and providing the proper care during this crucial phase can significantly enhance the health and beauty of your plants. This comprehensive guide will help you understand the indicators of impending blooms and offer practical care tips to ensure your orchids flourish.
## Understanding the Blooming Cycle of Phalaenopsis Orchids
Before diving into the signs of an impending bloom, it’s essential to understand the general life cycle of Phalaenopsis orchids. These orchids typically bloom once a year, but they can also produce multiple spikes or bloom continuously with the right care. The blooming process usually involves several stages, including the formation of flower spikes, the development of buds, and the eventual opening of flowers.
The blooming period can last for several weeks to a few months, depending on the environmental conditions and the health of the orchid. Knowing what to look for as your orchid approaches this exciting stage is crucial for successful care.
## Signs That Your Phalaenopsis Orchid Is About to Bloom
### 1. New Flower Spike Formation
One of the most apparent signs that your Phalaenopsis orchid is about to bloom is the emergence of a new flower spike. These spikes typically grow from the leaf axils (the point where the leaf meets the stem) and can vary in length. Here are key points to note about flower spikes:
– **Appearance**: The spike will initially appear as a green, straight shoot that gradually elongates. Unlike roots, which are thicker and more rigid, flower spikes are slender and flexible.
– **Timing**: New spikes usually form after a period of dormancy or rest, often during the late winter or early spring when light levels increase.
– **Length**: Depending on the health of the orchid and the care provided, flower spikes can grow anywhere from a few inches to several feet long.
### 2. Leaf Growth
As your orchid prepares to bloom, you may notice new leaves forming. Healthy, vigorous growth is a good indicator that your orchid is ready for its blooming cycle.
– **Healthy Leaves**: New leaves will be vibrant green and plump, indicating that the plant is receiving the right amount of light, water, and nutrients.
– **Leaf Shape**: Look for leaves that are firm and have a healthy shape; floppy or yellowing leaves can indicate poor health or inadequate care.
### 3. Bud Development
After the flower spike has formed, you may notice tiny buds starting to develop along the spike. This is an exciting stage as it signifies that flowers will soon follow.
– **Buds**: Initially, the buds will be small and green, but they will gradually swell and develop color as they approach the blooming stage.
– **Timing**: Buds typically form a few weeks after the flower spike has emerged, and their development can take anywhere from a few days to several weeks.
### 4. Increased Water and Nutrient Needs
As your orchid prepares to bloom, it may require additional water and nutrients to support the growth of flowers. Be attentive to changes in your watering and fertilization routine.
– **Watering**: Pay attention to the moisture level in the potting medium. If the medium dries out more quickly, it may indicate that your orchid is gearing up for a bloom.
– **Fertilization**: Consider using a balanced orchid fertilizer to provide essential nutrients during this period. Look for a fertilizer with higher phosphorus content to promote blooming.
## Caring for Your Phalaenopsis Orchid Before and During Blooming
Once you’ve recognized the signs that your orchid is about to bloom, it’s essential to provide the right care to maximize its flowering potential. Here are some tips to ensure your Phalaenopsis orchids thrive during this crucial stage:
### 1. Optimize Light Conditions
Phalaenopsis orchids require bright, indirect light to thrive and bloom.
– **Placement**: Place your orchids near a window that receives filtered sunlight. South or east-facing windows are ideal, but avoid direct sunlight as it can scorch the leaves.
– **Supplemental Lighting**: If natural light is insufficient, consider using grow lights to provide additional illumination during the winter months.
### 2. Maintain Proper Temperature and Humidity
Temperature and humidity play a vital role in the blooming process.
– **Temperature**: Ideal daytime temperatures range between 75°F to 85°F (24°C to 29°C), while nighttime temperatures should be around 60°F to 70°F (15°C to 21°C). A slight drop in nighttime temperatures can help trigger blooming.
– **Humidity**: Phalaenopsis orchids thrive in humidity levels of 50-70%. You can increase humidity by using a humidifier or placing a tray of water with pebbles beneath the orchid pots.
### 3. Watering Practices
Proper watering is crucial during the blooming stage.
– **Frequency**: Water your orchid when the top inch of the potting medium feels dry. Be careful not to overwater, as this can lead to root rot.
– **Method**: Water thoroughly until it drains from the bottom of the pot, allowing the roots to absorb moisture evenly. Avoid letting the plant sit in water.
### 4. Fertilization Schedule
Feeding your orchid appropriately can enhance its blooming potential.
– **Fertilizer Type**: Use a balanced orchid fertilizer or one with higher phosphorus content (e.g., a 30-10-10 or 10-30-20 ratio) during the blooming phase.
– **Application Frequency**: Fertilize every two to four weeks, depending on the fertilizer’s strength and your orchid’s needs. Always follow the manufacturer’s instructions for dilution rates.
### 5. Pruning and Maintenance
Taking care of your orchid’s structure is essential for healthy blooms.
– **Removing Old Spikes**: After blooming, prune the spent flower spike back to a healthy node or all the way to the base if the spike is brown. This encourages new growth.
– **Cleaning Leaves**: Gently wipe the leaves with a damp cloth to remove dust and promote photosynthesis.
### 6. Monitoring for Pests
As your orchid approaches the blooming stage, it’s essential to keep an eye out for pests that may hinder its growth.
– **Regular Checks**: Inspect your orchids weekly for signs of pests such as aphids, mealybugs, or spider mites. Early detection is key to effective control.
– **Treatment Options**: Use insecticidal soap or neem oil to treat any infestations promptly.
## Enjoying the Blooming Process
As your Phalaenopsis orchids prepare to bloom, be patient and attentive. The blooming process can vary significantly from plant to plant, with some orchids taking longer than others.
– **Enjoy the Journey**: Take the time to observe the changes in your orchids as they progress through the blooming stages. Each day may bring new developments, from the elongation of flower spikes to the opening of vibrant blooms.
– **Celebrate the Blooms**: Once your orchids begin to flower, enjoy their beauty and share the joy with others. Phalaenopsis orchids can produce stunning displays that last for weeks, making them a highlight in any home or garden.
## Conclusion
Recognizing the signs that your Phalaenopsis orchids are about to bloom and providing the appropriate care is essential for a successful flowering cycle. By understanding the blooming process and implementing the necessary care techniques, you can enjoy a beautiful display of flowers that enhances your living space.
With attention to detail and a little patience, your Phalaenopsis orchids can flourish and reward you with stunning blooms year after year. Embrace the experience of nurturing these exquisite plants, and let their beauty brighten your home.


