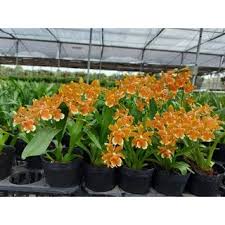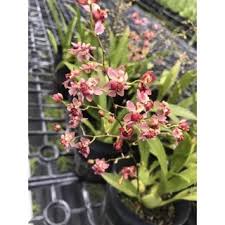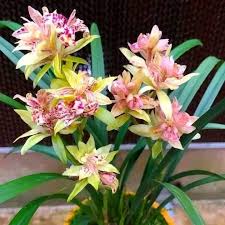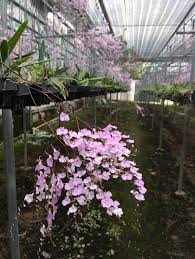
Oncidium orchids, commonly known as “dancing lady orchids,” are renowned for their vibrant and unique flowers. However, these beautiful plants can sometimes exhibit poor growth, leading to frustration for both novice and experienced gardeners. Understanding the causes of suboptimal growth and implementing effective solutions can help revive your Oncidium orchids and ensure they thrive. In this comprehensive guide, we will explore various aspects of orchid care, identifying potential issues and providing actionable strategies for promoting healthy growth.
## 1. Understanding Oncidium Orchids
### 1.1 Characteristics of Oncidium Orchids
Oncidium orchids are characterized by their distinctive flower shapes and vibrant colors. These epiphytic plants thrive in their native habitats of Central and South America, where they grow on trees and other surfaces. Understanding their natural environment is crucial for replicating optimal growing conditions at home.
### 1.2 Growth Habits
Oncidium orchids have unique growth habits, including:
– **Pseudobulbs**: These swollen stems store water and nutrients, helping the plant survive in periods of drought.
– **Roots**: The aerial roots of Oncidium orchids absorb moisture and nutrients from the air, making them highly adaptable to varying environments.
– **Leaves**: Oncidium leaves are typically long and narrow, and healthy leaves are crucial for photosynthesis and overall plant vigor.
### 1.3 Typical Growth Phases
Oncidium orchids go through several growth phases, including:
– **Active Growth**: This phase usually occurs during spring and summer when the plant produces new leaves and pseudobulbs.
– **Resting Phase**: In fall and winter, Oncidium orchids enter a resting phase where growth slows down, and the plant conserves energy.
Understanding these phases is essential for providing appropriate care at different times of the year.
## 2. Identifying Signs of Poor Growth
Before addressing poor growth, it’s essential to identify the signs that indicate your Oncidium orchid is not thriving:
### 2.1 Common Symptoms
– **Yellowing Leaves**: Leaves that turn yellow may indicate overwatering, underwatering, or nutrient deficiencies.
– **Wilting**: Droopy or wilted leaves can signal inadequate watering or root problems.
– **Stunted Growth**: If your orchid is not producing new growth, it may be suffering from environmental stress or nutrient deficiencies.
– **Root Rot**: A foul odor or mushy roots when inspecting the potting medium can indicate root rot, a serious issue that affects growth.
### 2.2 Environmental Factors
Assessing environmental factors can help identify the root cause of poor growth:
– **Light Levels**: Oncidium orchids require bright, indirect light. Insufficient light can hinder growth.
– **Temperature Fluctuations**: Sudden changes in temperature can stress the plant and disrupt growth patterns.
– **Humidity Levels**: Oncidium orchids thrive in humidity levels of 40-70%. Low humidity can impede growth.
## 3. Common Causes of Poor Growth
Identifying the underlying causes of poor growth in Oncidium orchids is essential for effective intervention. Here are some common factors that may affect their growth:
### 3.1 Watering Issues
Proper watering practices are crucial for the health of Oncidium orchids:
– **Overwatering**: Too much water can lead to root rot, causing poor growth. Always ensure that the potting medium is well-draining.
– **Underwatering**: Insufficient water can lead to dehydration and stunted growth. The potting medium should dry slightly between waterings.
### 3.2 Nutrient Deficiencies
A lack of essential nutrients can hinder growth:
– **Nitrogen Deficiency**: Nitrogen is vital for leaf and stem growth. A deficiency may cause yellowing leaves and poor growth.
– **Phosphorus Deficiency**: Phosphorus promotes root development and flowering. A deficiency can result in weak roots and reduced blooming.
### 3.3 Inadequate Light
Insufficient light can lead to poor growth:
– **Low Light Conditions**: Oncidium orchids require bright, indirect light to thrive. Lack of light can result in elongated stems and reduced flowering.
### 3.4 Temperature and Humidity
Temperature and humidity levels significantly impact orchid growth:
– **Temperature Extremes**: Oncidium orchids prefer temperatures between 65°F and 80°F (18°C to 27°C). Extreme temperatures can lead to stress and poor growth.
– **Low Humidity**: Insufficient humidity can cause leaf tip browning and overall stress. Maintaining humidity levels of 40-70% is crucial.
### 3.5 Pests and Diseases
Pests and diseases can weaken your orchids:
– **Common Pests**: Aphids, mealybugs, and spider mites can damage leaves and stems, impacting growth.
– **Fungal and Bacterial Infections**: These infections can lead to leaf spot diseases and root rot, hindering overall plant health.
## 4. Solutions for Promoting Healthy Growth
Now that we’ve identified the signs and causes of poor growth in Oncidium orchids, let’s explore practical solutions to promote healthy growth:
### 4.1 Watering Practices
Implementing proper watering techniques is vital for orchid health:
– **Assess Moisture Levels**: Before watering, check the potting medium’s moisture level by inserting your finger about an inch deep. Water only if it feels dry.
– **Watering Frequency**: Generally, Oncidium orchids should be watered every 5-10 days, depending on environmental conditions. Adjust frequency based on temperature and humidity levels.
– **Use Room Temperature Water**: Watering with room temperature water can prevent shocking the roots.
### 4.2 Fertilization Techniques
Nutrient supplementation is essential for promoting healthy growth:
– **Balanced Fertilizer**: Use a balanced orchid fertilizer (e.g., 30-10-10) during the growing season to provide essential nutrients.
– **Fertilizer Schedule**: Fertilize every two to four weeks during the active growth phase. Reduce or eliminate fertilization during the resting phase.
– **Dilution**: Dilute fertilizer to half strength to avoid nutrient burn and buildup in the potting medium.
### 4.3 Providing Adequate Light
Optimizing light exposure can significantly improve growth:
– **Light Placement**: Position your Oncidium orchid near a bright window with filtered sunlight. East or west-facing windows are ideal.
– **Artificial Lighting**: If natural light is insufficient, consider using grow lights to provide the necessary brightness.
### 4.4 Managing Temperature and Humidity
Creating a suitable environment is critical for healthy growth:
– **Temperature Control**: Maintain indoor temperatures within the optimal range. Use heating or cooling systems to regulate temperature.
– **Humidity Solutions**: Increase humidity levels by using a humidifier or placing a tray of water with pebbles near the orchids. Misting can also help but avoid excessive moisture on leaves.
### 4.5 Pest and Disease Management
Regular monitoring and intervention are essential for maintaining plant health:
– **Inspect Regularly**: Check your orchids weekly for signs of pests or diseases. Early detection is crucial for successful treatment.
– **Natural Pest Control**: Use insecticidal soap or neem oil to treat pest infestations. Always follow the manufacturer’s instructions for application.
– **Preventive Measures**: Keep your growing area clean and well-ventilated to reduce the risk of fungal and bacterial infections.
## 5. Repotting Your Oncidium Orchid
If your Oncidium orchid continues to struggle despite your efforts, it may be time to repot:
### 5.1 Signs That Repotting Is Necessary
– **Root Bound**: If roots are growing out of the drainage holes or circling the pot, it’s time to repot.
– **Decomposed Medium**: Over time, potting media can break down, leading to poor drainage. If the medium appears compacted or decomposed, repotting is necessary.
### 5.2 Choosing the Right Potting Medium
Select a suitable potting mix for Oncidium orchids:
– **Orchid Potting Mix**: Use a well-draining orchid potting mix that contains bark, perlite, and sphagnum moss for optimal moisture retention and aeration.
– **Sterilization**: Ensure that the potting materials are sterilized to prevent introducing pests or diseases.
### 5.3 Repotting Steps
Follow these steps for successful repotting:
1. **Remove the Orchid**: Gently take the orchid out of its current pot, being careful not to damage the roots.
2. **Inspect the Roots**: Trim away any dead or rotting roots with sterilized pruning shears.
3. **Prepare the New Pot**: Fill the new pot with fresh potting mix, leaving enough space for the orchid.
4. **Reposition the Orchid**: Place the orchid in the new pot and add potting mix around the roots. Ensure the base of the plant is level with the pot rim.
5. **Water Thoroughly**: Water the orchid after repotting to help settle the media and reduce transplant shock.
## 6. Conclusion
Caring for Oncidium orchids can be a rewarding experience, but it requires attention to detail and an understanding of the plant’s needs. By recognizing the signs of poor growth, identifying potential causes, and implementing effective solutions, you can promote healthy growth and vibrant blooms.
Remember that Oncidium orchids thrive on consistent care, including proper watering, fertilization, light exposure, temperature and humidity management, and pest control. With patience and dedication, you can nurture your Oncidium orchids back to health and enjoy their stunning beauty for years to come.
Whether you are a seasoned orchid enthusiast or a beginner, the journey of caring for On
cidium orchids is filled with learning and growth. Embrace the challenges, and your efforts will be rewarded with the breathtaking blooms that make these orchids truly remarkable.


