When you acquire a Sato Cymbidium orchid, whether from a local nursery or an online vendor, the excitement of adding this beautiful plant to your collection can quickly be overshadowed by concerns about its care. Proper handling after transportation is crucial to ensure that the orchid acclimates well and thrives in its new environment. This guide will provide you with a comprehensive, step-by-step approach to caring for your Sato Cymbidium orchid post-transportation, ensuring it remains healthy and vibrant.
## Understanding Sato Cymbidium Orchids
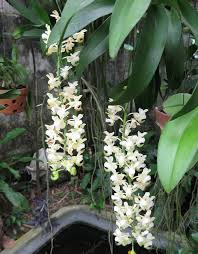
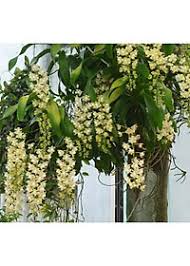
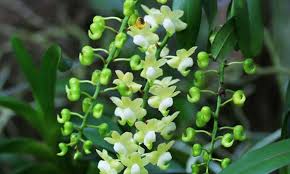
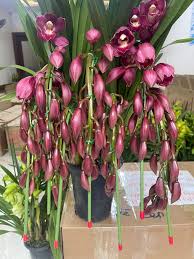
Before delving into care steps, it’s essential to understand what makes Sato Cymbidium orchids unique. These orchids are known for their stunning, large blooms that come in various colors, including white, yellow, pink, and red. They typically bloom in winter or early spring, making them a popular choice for ornamental displays.
### Key Characteristics of Sato Cymbidium Orchids
1. **Growing Conditions**: Sato Cymbidium orchids thrive in bright, indirect light and prefer cooler temperatures, making them ideal for outdoor cultivation in temperate climates.
2. **Watering Needs**: They prefer a balance of moisture, needing to dry slightly between waterings to prevent root rot.
3. **Humidity Preferences**: Moderate humidity levels (40%-70%) are ideal for these orchids, which can be achieved with humidity trays or misting.
Understanding these characteristics will help you implement the care steps effectively.
## Step 1: Unpacking the Orchid
### 1.1 Handle with Care
When you receive your Sato Cymbidium orchid, handle the package gently to avoid damaging the plant. Carefully open the box and remove any protective materials, ensuring that you do not disturb the plant itself.
### 1.2 Inspect for Damage
Examine the orchid for any signs of damage, such as broken leaves or wilted flowers. Check the roots for health by looking for firm, white roots. Brown or mushy roots indicate overwatering or damage.
### 1.3 Remove Excess Packaging
Remove any packing materials that may have been used to secure the plant during transport. This includes foam, plastic, or any other cushioning materials. Be cautious not to pull or tug on the plant itself.
## Step 2: Acclimatization
### 2.1 Find a Suitable Location
Place your Sato Cymbidium orchid in a temporary location away from direct sunlight, drafts, or extreme temperatures. A bright room with indirect light is ideal for this initial phase. This helps the plant acclimate to its new environment without the stress of sudden temperature changes.
### 2.2 Monitor Temperature and Humidity
Ensure that the room temperature is within the optimal range for Sato Cymbidium orchids, which is between 60°F and 75°F (15°C to 24°C). Maintain humidity levels around 40%-70% using a humidifier or by placing a shallow tray of water nearby.
### 2.3 Gradual Exposure to Light
After a few days, gradually introduce your orchid to more light. Start with a few hours of indirect sunlight, then increase exposure over several days. This helps the plant adjust without the risk of sunburn.
## Step 3: Potting and Repotting
### 3.1 Assess the Potting Medium
Most orchids are shipped in temporary pots with sphagnum moss or bark. Inspect the medium to ensure it’s suitable for Sato Cymbidium orchids. If the medium is breaking down or overly wet, repotting may be necessary.
### 3.2 Choose the Right Pot
Select a pot that is slightly larger than the current one and has drainage holes. Sato Cymbidium orchids prefer a well-draining potting mix designed specifically for orchids.
### 3.3 Repotting Process
1. **Remove the Orchid**: Gently take the orchid out of its temporary pot, being cautious of the roots.
2. **Trim Damaged Roots**: If you find any damaged or rotting roots, trim them with sterilized scissors.
3. **Add Fresh Potting Medium**: Place the orchid in the new pot and fill in with fresh potting medium, ensuring the roots are adequately covered but the crown (the base of the leaves) remains above the medium.
### 3.4 Watering After Repotting
After repotting, water the orchid lightly to help settle the potting medium. Avoid overwatering, as the roots may still be adjusting.
## Step 4: Watering and Feeding
### 4.1 Establish a Watering Routine
Sato Cymbidium orchids prefer to dry slightly between waterings. A good rule of thumb is to check the top inch of the potting medium; if it feels dry, it’s time to water. Depending on environmental conditions, this may range from once a week to every 10 days.
### 4.2 Watering Technique
Water the orchid thoroughly until water drains from the bottom of the pot. This ensures that all the roots receive moisture. Avoid letting the plant sit in water, as this can lead to root rot.
### 4.3 Fertilization Schedule
After a month of settling in, begin a fertilization regimen. Use a balanced orchid fertilizer diluted to half strength. Feed the orchid every two weeks during the growing season (spring and summer) and reduce to once a month during the dormant season (fall and winter).
## Step 5: Regular Maintenance
### 5.1 Monitor for Pests
Regularly inspect your Sato Cymbidium orchid for signs of pests such as aphids, mealybugs, or spider mites. If you notice any, treat the plant with an appropriate insecticidal soap or neem oil.
### 5.2 Pruning and Deadheading
Trim any yellowing or dead leaves to promote healthy growth. Deadhead spent flowers to encourage new blooms and prevent the plant from expending energy on fading blossoms.
### 5.3 Repotting Schedule
Plan to repot your Sato Cymbidium orchid every two to three years or when the potting medium begins to break down. This helps refresh nutrients and promotes healthy root growth.
## Step 6: Monitoring Growth and Blooms
### 6.1 Track Growth Patterns
Keep an eye on your orchid’s growth patterns. Healthy Sato Cymbidium orchids will produce new leaves and may develop flower spikes. Document any changes to understand what conditions foster optimal growth.
### 6.2 Anticipate Flowering
Sato Cymbidium orchids typically bloom in winter or early spring. Monitor your plant’s growth closely as it approaches the blooming season. Ensure it has adequate light, humidity, and nutrients to support flower production.
### 6.3 Enjoying the Blooms
When your Sato Cymbidium orchid begins to bloom, make sure to position it where it can be admired. These orchids can produce stunning clusters of flowers, and proper care will result in long-lasting blooms.
## Conclusion
Caring for your Sato Cymbidium orchid after transportation is a rewarding process that involves careful attention to acclimatization, potting, watering, feeding, and regular maintenance. By following these steps, you can ensure that your orchid thrives in its new environment, offering you beauty and joy for years to come.
Remember, the key to successful orchid care lies in understanding their unique needs and responding appropriately. With patience and diligence, your Sato Cymbidium orchid will flourish, adding a touch of elegance to your home or garden. Enjoy the journey of nurturing your orchid and witnessing its magnificent blooms as a result of your dedicated care.
# Care Steps for Sato Cymbidium Orchids After Transportation: Part 2
Continuing from our previous discussion on the essential steps to care for Sato Cymbidium orchids after transportation, this section will delve deeper into specialized care routines, troubleshooting common issues, and the nuances of promoting a thriving environment for your orchids. It’s essential to ensure your orchid receives the best care to acclimatize successfully, flourish, and bloom beautifully.
## Step 7: Advanced Watering Techniques
### 7.1 Understanding Water Quality
The quality of water used for your Sato Cymbidium orchid can significantly impact its health. Here are some considerations:
– **Tap Water**: Tap water may contain chlorine, fluoride, and other chemicals that can be harmful to orchids. If using tap water, let it sit out for at least 24 hours to allow chemicals to dissipate.
– **Filtered Water**: Using filtered water is ideal. Reverse osmosis (RO) water is an excellent choice as it removes most impurities and minerals, making it safe for orchids.
– **Rainwater**: Collecting rainwater is another natural and chemical-free option. Ensure it is clean and free from debris before using it on your orchids.
### 7.2 Watering Frequency Adjustments
While a general rule is to water when the top inch of the potting medium feels dry, various factors can affect watering frequency:
– **Temperature**: Warmer temperatures may require more frequent watering, while cooler conditions can extend the time between waterings.
– **Humidity Levels**: Higher humidity can slow down the drying process, allowing for less frequent watering. Conversely, in dry environments, you may need to water more often.
– **Seasonal Changes**: During the growing season (spring and summer), orchids typically require more water due to increased metabolic activity. In contrast, during dormancy (fall and winter), reduce watering frequency.
### 7.3 Signs of Overwatering and Underwatering
Understanding the signs of both overwatering and underwatering is crucial for maintaining the health of your Sato Cymbidium orchid:
– **Overwatering Symptoms**:
– Yellowing leaves, especially the lower leaves.
– Mushy or darkened roots that may give off a foul odor.
– Leaf drop or wilting despite moist potting medium.
– **Underwatering Symptoms**:
– Leaf wilting or drooping.
– Dry, shriveled roots.
– Leaves turning brown at the tips.
When you identify these signs, adjust your watering routine accordingly to correct the issue.
## Step 8: Humidity Management
### 8.1 Maintaining Optimal Humidity Levels
Sato Cymbidium orchids thrive in humidity levels between 40% and 70%. Here are some effective methods to maintain humidity:
– **Humidity Trays**: Place a shallow tray filled with water and pebbles under your orchid pot. As the water evaporates, it increases humidity around the plant without allowing the roots to sit in water.
– **Misting**: Lightly mist your orchid every few days, particularly during dry seasons. However, avoid over-misting, which can promote fungal diseases.
– **Humidity Monitors**: Use a hygrometer to monitor humidity levels in your orchid’s environment. This can help you adjust care strategies as needed.
### 8.2 Grouping Plants
If you have multiple orchids or houseplants, consider grouping them together. Plants naturally release moisture through transpiration, increasing humidity in their immediate environment. This method can create a microclimate that benefits all plants involved.
## Step 9: Fertilization Techniques
### 9.1 Choosing the Right Fertilizer
Selecting an appropriate fertilizer for Sato Cymbidium orchids is vital for their growth and blooming. Look for fertilizers that are specifically formulated for orchids and have a balanced NPK ratio (Nitrogen, Phosphorus, Potassium), such as 30-10-10. Additionally, consider these options:
– **Slow-Release Fertilizers**: These can be mixed into the potting medium for continuous nourishment over time.
– **Liquid Fertilizers**: These are excellent for more immediate nutrient uptake. Dilute to half-strength and use them during your regular watering schedule.
### 9.2 Fertilization Schedule
1. **Growing Season (Spring and Summer)**: Fertilize every two weeks. During this period, your Sato Cymbidium orchid will need more nutrients to support growth and blooming.
2. **Dormant Season (Fall and Winter)**: Reduce fertilization to once a month, as the plant will not be actively growing.
### 9.3 Avoiding Over-Fertilization
Over-fertilizing can lead to salt buildup in the potting medium, which can damage the roots. To avoid this, flush the potting medium with clear water every couple of months. This process helps remove any accumulated salts, promoting healthier roots.
## Step 10: Pruning and Maintenance
### 10.1 Regular Pruning Practices
Pruning is essential for maintaining the health and appearance of your Sato Cymbidium orchid. Here are some pruning techniques to consider:
– **Removing Dead or Yellowing Leaves**: Trim these leaves at the base to improve airflow around the plant and reduce the risk of disease.
– **Deadheading**: After blooming, remove spent flower spikes by cutting them close to the base. This encourages new growth and can prevent the plant from expending energy on fading blooms.
### 10.2 Sterilization of Tools
Always use sterilized scissors or pruning shears when trimming your orchid. This practice helps prevent the spread of diseases and infections. You can sterilize tools using rubbing alcohol or a bleach solution (1 part bleach to 9 parts water).
## Step 11: Pest and Disease Management
### 11.1 Identifying Common Pests
Sato Cymbidium orchids can be susceptible to various pests, including:
– **Mealybugs**: Small, white, cotton-like insects that feed on plant sap.
– **Aphids**: Tiny, green insects that can distort new growth and lead to sticky residues.
– **Spider Mites**: Microscopic pests that thrive in dry conditions, often causing yellowing leaves and webbing.
### 11.2 Integrated Pest Management (IPM)
Implement an integrated pest management strategy to address pest issues effectively:
– **Regular Inspections**: Check your orchid weekly for signs of pests or damage.
– **Neem Oil or Insecticidal Soap**: Treat infestations promptly with these organic solutions. Apply according to package instructions, focusing on the affected areas.
– **Isolate Infected Plants**: If you detect pests, isolate the affected plant to prevent the spread to other orchids.
### 11.3 Monitoring for Diseases
Orchids can also be prone to diseases like root rot or leaf spot. Monitor for symptoms such as:
– **Root Rot**: Brown, mushy roots and yellowing leaves.
– **Leaf Spot**: Brown or black spots on leaves, often caused by fungal infections.
To combat diseases, adjust care routines (such as watering and humidity) and apply appropriate fungicides as needed.
## Step 12: Observing Growth and Environmental Changes
### 12.1 Tracking Growth Patterns
Observe your Sato Cymbidium orchid’s growth over time. Healthy growth includes:
– **New Leaves**: Look for new growth emerging from the center of the plant.
– **Flower Spikes**: Watch for flower spikes developing, which indicate blooming is approaching.
### 12.2 Adjusting Care Based on Observations
Be prepared to adjust your care routine based on your orchid’s responses. For example:
– If your orchid produces weak, leggy growth, it may require more light.
– If leaf tips turn brown, it may need more humidity or less fertilizer.
### 12.3 Seasonal Adjustments
Seasonal changes can affect your orchid’s care needs. Be mindful of temperature fluctuations and adjust your watering and humidity routines accordingly.
## Step 13: Preparing for Blooming Season
### 13.1 Understanding Blooming Triggers
Sato Cymbidium orchids typically bloom in winter or early spring. To encourage blooming, ensure your orchid experiences the right conditions:
– **Temperature Variation**: A slight drop in nighttime temperatures can help trigger bloom development.
– **Adequate Light**: Ensure your orchid receives bright, indirect light during the day.
### 13.2 Nutritional Support
In the weeks leading up to the anticipated bloom period, increase the frequency of fertilization to support bud development. Maintain a balanced fertilizer regime to promote healthy blooms.
## Conclusion
Caring for your Sato Cymbidium orchid after transportation requires a multi-faceted approach that encompasses watering, humidity control, fertilization, pruning, pest management, and careful observation. By following these detailed steps, you can ensure your orchid thrives in its new environment and rewards you with stunning blooms for years to come.
With dedication and attention to detail, your Sato Cymbidium orchid can become a centerpiece in your home or garden, reflecting the beauty and elegance that these remarkable plants offer. Embrace the journey of orchid care, and enjoy the satisfaction of nurturing a living work of art that brings life and color to your surroundings.